

An unbiased opinion on what you will need to build a home golf simulator
Last Updated: January 2024
At F1C, we are fortunate enough to have two golf simulators that we have built from scratch: one in a garage and one in a dedicated indoor simulator room. Owning a home golf simulator can significantly improve your ability, because practice becomes more accessible. Personally, I’ve observed a substantial 4-5 shot reduction in my handicap since assembling my own setup.
This guide focuses on the meticulous process of building a home golf simulator. Building a home golf simulator has three crucial phases: planning, purchasing, and assembly. Specifically tailored for those seeking a home golf simulator, our guide delves into the essential considerations during the planning and purchasing stages. Similar to our detailed travel guides, we thoroughly explore various options and associated costs to empower you with informed decision-making.
It’s important to note that we won’t delve into “sim-in-a-box” solutions, where companies offer a pre-packaged simulator at a premium. Our focus is on guiding you through the creation of your own home or garage golf simulator, whether you’re aiming for an economical home golf simulator or a high-end Trackman golf simulator.
Planning
Space
First things first: ceiling height. The ceiling height required is dependent upon two factors: your swing and your height. For most regular individuals, 9-feet (9′) is the minimum ceiling height. If your room does not have 9′ ceilings or more, then you do not have space for a golf simulator. If you think “I’ll just hit irons” – it cannot be done. Further, 9′ is only for individuals who are under 6′ tall that have a relatively low finish. If you are taller or your finish is higher, you will need 10′ of ceiling height. A 9′ ceiling is suitable for those under 6 feet with a relatively low finish. If you’re taller or have a higher finish, aim for a 10′ ceiling. Exceptionally tall individuals with a high follow-through might require even more ceiling space, but in general, 10′ feet accommodates most golfers effectively.
Next, we need to discuss room dimensions. Your room dimensions will dictate your options to a certain extent when it comes to selecting a launch monitor, but the absolute minimum space is about 12′ by 12′. Some sites say you can technically get away with 10’x10′ – but this is not realistic in my opinion. You will feel cramped and swing much differently than normal, and the occasional shank would get a bit dangerous. Ideally, you would have around 16′ of length in the room, and 14′ of width, or more. This is an ideal space which will let your mind forget you are launching a golf ball in your garage.
Screen
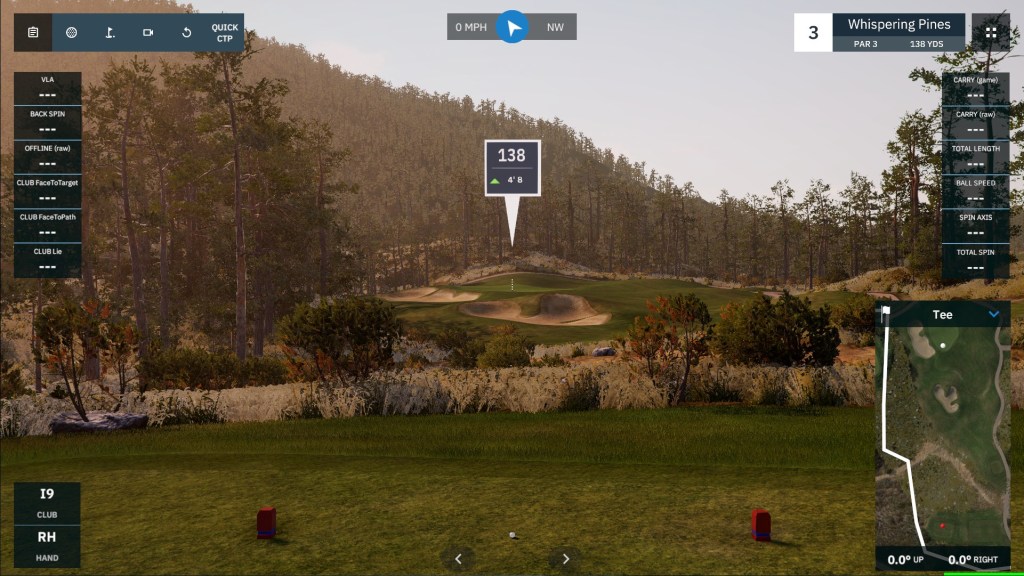
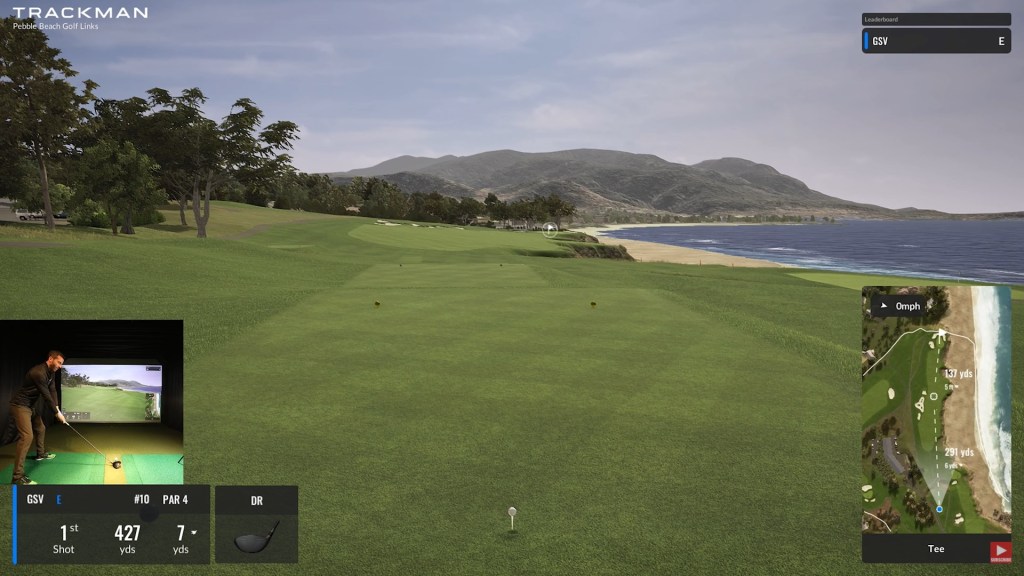
Now, assuming you’ve got ample space, the next crucial factor is determining the screen size that suits your setup. Screens typically come in two aspect ratios: 4:3 or 16:9. For most home spaces, a 4:3 ratio is optimal unless your room is exceptionally wide. A 10-foot-tall screen with a 4:3 ratio will be slightly over 13′ wide. In contrast, a 16:9 ratio would make it almost 18 feet wide. I strongly recommend prioritizing height over width, maximizing your available vertical space. Based on personal experience with an 8.5-foot-tall screen, hitting full wedges can be challenging as they might go too high and hit the screen enclosure. For those planning on using full wedges, a minimum 10-foot-tall screen is advised.
When it comes to screens, the go-to among DIY simulators is the Carl’s DIY Simulator Enclosure, available in standard pre-measured sizes. We’ll delve deeper into this during the purchasing section. Opting for a standard size is often more budget-friendly than going custom. It’s recommended to choose the tallest standard size that fits your space width for a cost-effective yet high-quality setup. Going the custom route is only advisable if you’re prepared to invest significantly in the simulator and have a dedicated space, as the extra expense may not be justified for most setups.
Computer
The computer can be an often forgotten piece of a golf simulator but it is a very important part. You may have a computer or laptop at home capable of running the simulation software of your choice, or you may want a dedicated desktop tower to run your golf simulator. Typically, the computer required to run a golf simulator is a mid-level gaming PC, but as new simulator software arrives with better graphics, higher end gaming PCs are being recommended. I am including this in the planning section to say – your work laptop probably will not have the beef specs required, and I would plan to invest in a computer just for this purpose, unless your side hobby is PC gaming.
Purchasing
Launch Monitor
Arguably the most significant investment in a home golf simulator is the launch monitor. It holds not only the potential to be the most expensive component but also plays a pivotal role in defining the nature of your simulator. The launch monitor is the key determinant of whether your simulator is purely for novelty and enjoyment or if it’s a precision tool designed to fine-tune your numbers for your upcoming rounds.
Launch monitors generally fall into two categories: radar-based and camera-based, each with its own set of advantages and drawbacks. Radar-based systems excel in tracking the ball over longer distances, making them suitable for outdoor setups. However, indoors, they often necessitate marking the ball with a metallic sticker or utilize specialized golf balls (like the Titleist RCT) in order to assist with tracking over short distances. Camera-based systems typically work better inside with more limited flight, but since they aren’t tracking the ball more than a few feet after impact, they are inherently less accurate. That isn’t to say they can’t be very accurate – the GCQuad is arguably just as accurate is if it had tracked the ball the entire way down range. Camera based systems also require metallic stickers on the clubface in order to get club data.
Speaking of club data, that is typically the difference between entry level models and more expensive models. Most of the cheaper models only track the ball, but as you get higher in price range, the club tracking features come too.
I will list the launch monitors in order from cheapest to most expensive, with some musings along the way. Further, overhead fixed launch monitors are omitted from this list, as they are too expensive and are better suited for more permanent, professional setups.
- Flightscope Mevo – $425 – Radar – FlightScope has largely stopped advertising this thing in favor of the Mevo+. This was novel a few years ago and can provide some data, but there are significant accuracy concerns.
- OptiShot 2 Golf Simulator – $500 – Toy – If you are considering buying a golf simulator and investing a significant amount of money into this, move past the OptiShot. This is a toy, not a launch monitor.
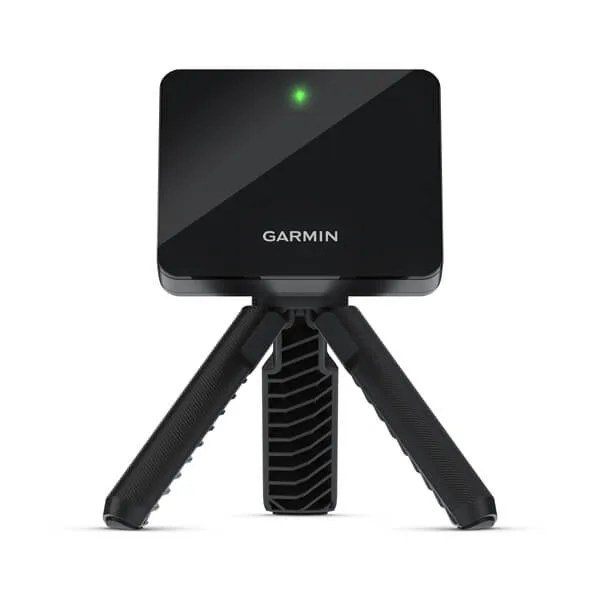
- Garmin R10 Launch Monitor – $600 – Radar – An interesting consideration, because of its price point, ability to use outdoors, and its integration with TGC 2019 and E6 (two popular simulation software that we will touch on later). However, the R10 has significant accuracy concerns and probably falls much closer to the “stay warm and have fun” rather than “serious competitive numbers.” However, if you are looking to save and just want a simple experience of hitting a ball in your garage with some feedback, this isn’t the worst option.
- Rapsodo MLM2PRO Mobile Launch Monitor – $699 – Radar – A newer option that has its own integrated simulation system. The jury is still out on this product due to its newness.

- FlightScope Mevo+ 2023 Edition – $1,999 – Radar – Probably the first system on this list that provides reliable data, and while it may not be trackman-level reliable, it is reliable enough for a mid-handicap player. Mevo+ can integrate with E6 software.
- SkyTrak Launch Monitor – $1,999 – Camera – The original SkyTrak was extremely novel when it came out and was my first launch monitor. It doesn’t work well at the range, but provides a relatively seamless experience and decent accuracy in this price range. SkyTrak can provide club data, but it is only estimated club data, rather than measured. Connects with E6 and TGC software.
- SkyTrak+ Launch Monitor – $2,995 – Camera – Now this is where things get interesting. Before this, none of these launch monitors can actually measure any club data – but the SkyTrak+ can, and it gives a LOT of club data for the price. SkyTrak has always pushed the envelope on affordability and features-for-value, and the SkyTrak+ may be the best deal on the market in 2024.
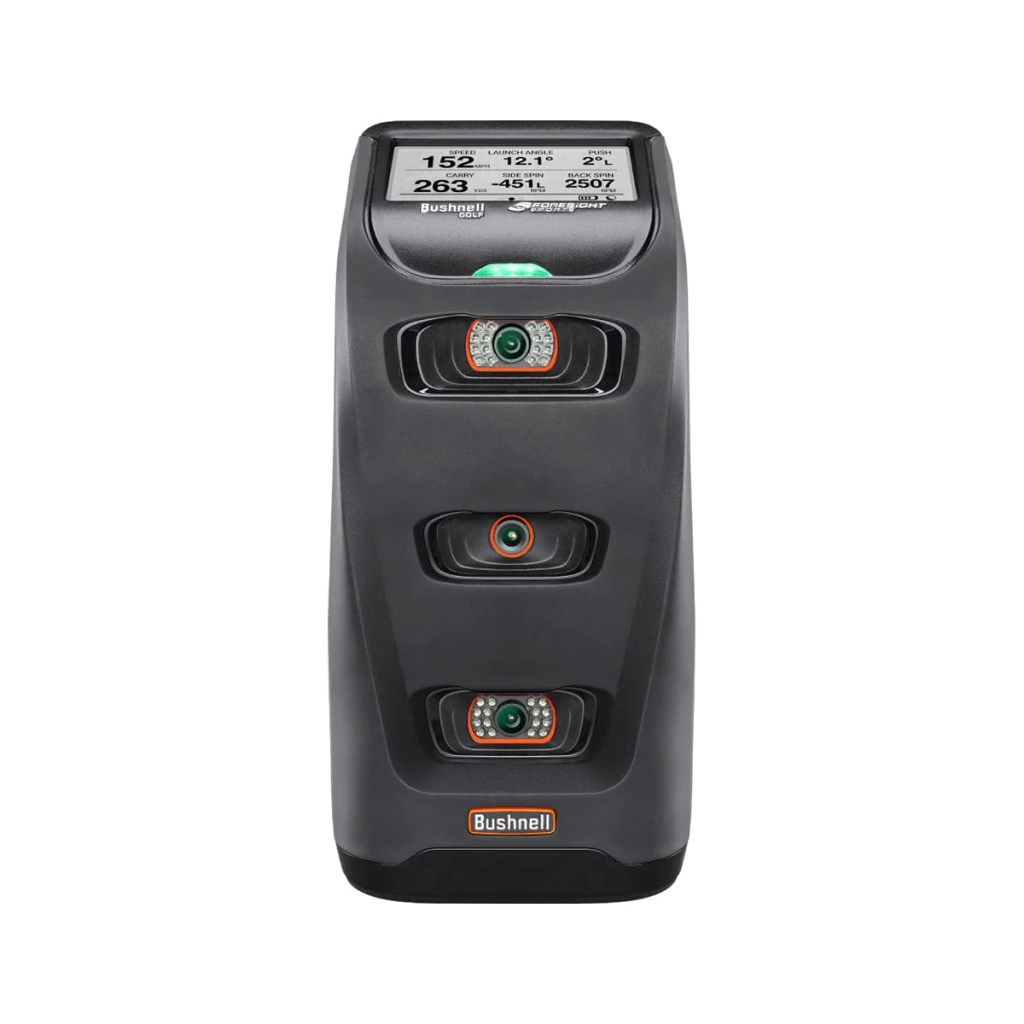
- Bushnell Launch Pro – $???? – Camera – This is an interesting system. The Bushnell Launch Pro is the exact same thing as the Foresight GC3 that you will see later in the list, but works on a subscription model, along with variable pricing. The BLP can be acquired for $1,999 with ball data only, but club data will cost an extra $1,500, just for the machine, bringing the price to $3,499. Then come the subscriptions: if you’d like to actually use your BLP, its an extra $500/year for the subscription. So all in all, this is a $4,000 product at minimum. The other problem, this is changing constantly. Every year of the BLP’s existence, the subscriptions have been different and differently priced, the price of the monitor has been different, etc. The benefit is that you can use this monitor with FSX2020, FSX Play, or GSPro, which are thought of as the three best simulation software. So, premium usability at under $4,000 certainly peaks a lot of interest.
- Uneekor Eye Mini Launch Monitor – $4,500 – Camera – Uneekor is a big name in overhead, fixed launch monitors, but this is their opening foray into personal, portable launch monitors. TGC, E6 Connect, and GSPro are the software options here.
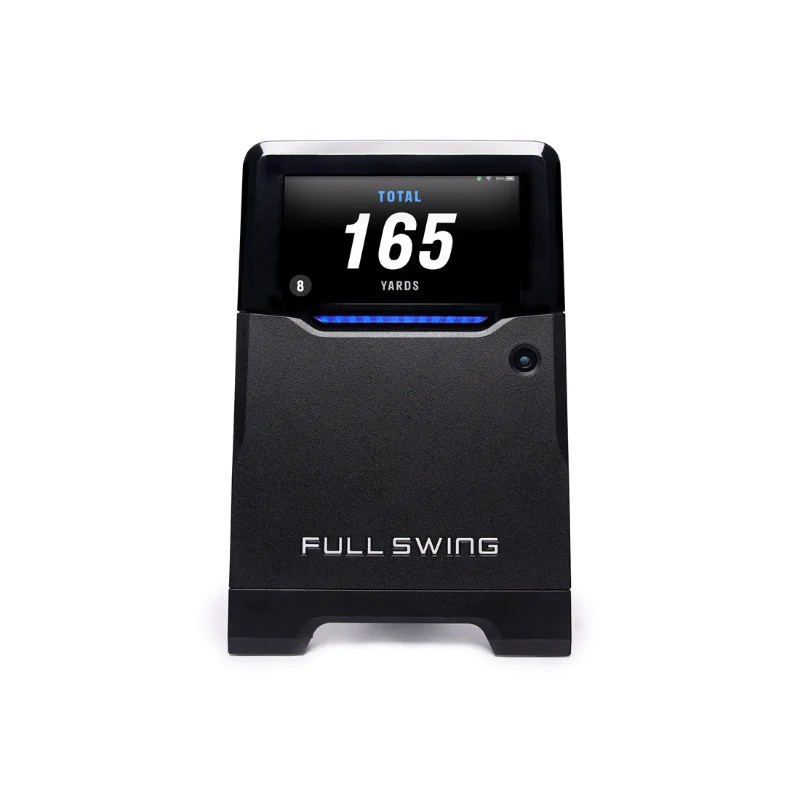
- Full Swing Kit Launch Monitor – $4,999 – Radar – Full Swing would like to have you believe Tiger uses this. Spoiler alert, he does not. But, it does offer a pretty complete suite of data at this price, but only uses E6 Connect (likely the worst software) for simulation.
- Foresight Sports GC3 Launch Monitor – $6,999 – Camera – The same exact thing as the Bushnell Launch Pro, just fully unlocked with no subscriptions or add ons. The GC3/BLP has three cameras, two for the ball and one for the club, and the accuracy is very close to Foresight’s top model the GCQuad.
- FlightScope X3 – $11,500 – Radar – Flightscope’s top of the line offering often gets forgotten, as it has been left behind by tour professionals in favor of the GCQuad and Trackman 4. It may be the best deal around right now though, as it offers all the same stats and likely a similar accuracy for a fraction of the price. I’d expect to see FlightScope update this offering within the next year.
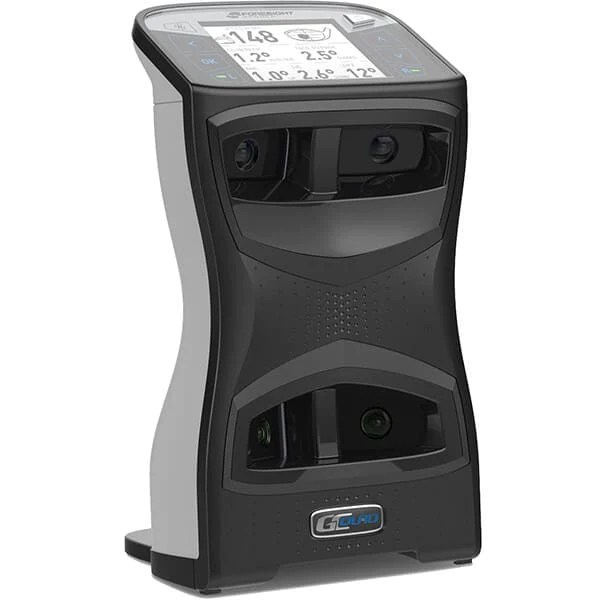
- Foresight Sports GCQuad Launch Monitor – $???? – Camera – Add another camera to the GC3, and add in a stupid pricing structure like the BLP, and you have the GCQuad. It is technically only $14,500, but if you’d like to get more functionality than a Garmin R10 for your money, you are going to need to add on around $5,500 more for clubhead and putting analysis. That brings the real price up to $21,000. A hefty sum for the industry-standard and preferred choice of many PGA Tour professionals.
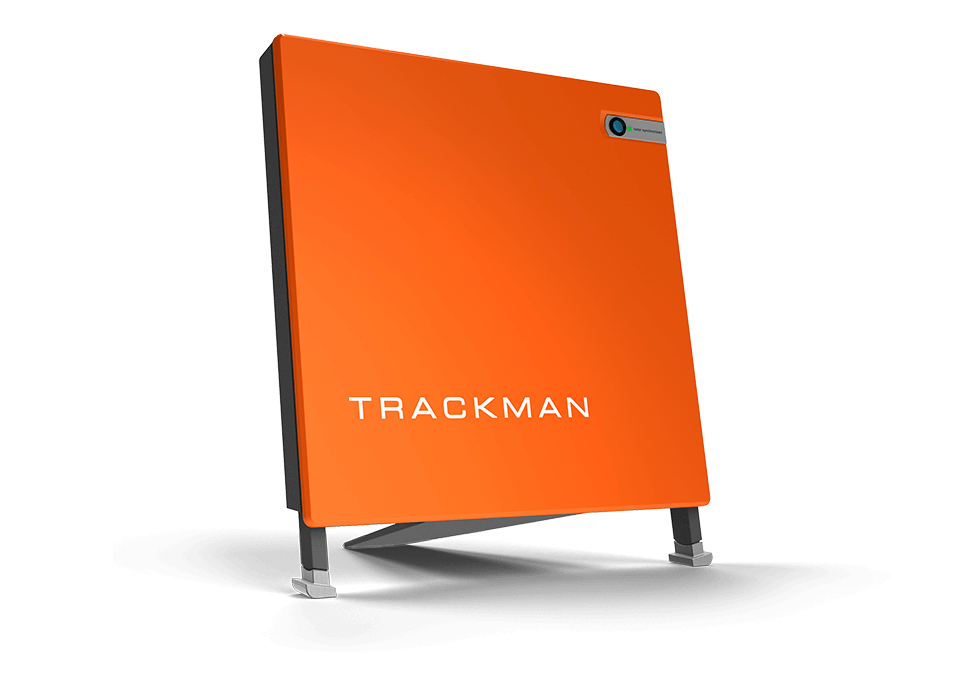
- Trackman 4 Launch Monitor – $24,999 – Radar – The top end radar offering and the industry standard for accuracy. However, many pros and simulator enthusiasts debate on whether the Quad or Trackman 4 is the most accurate.
Final takeaway: there are a lot of options. What was once limited to 3 or 4 offerings has expanded significantly, with new choices emerging almost monthly. If I were to make a recommendation, I’d suggest exploring options in the $2,000 – $5,000 range. This sweet spot strikes a balance, providing ample accuracy for reliable data without straining your budget like some higher-priced models.
Golf Mats
More options! Of course, a mat is a necessity unless you intend to hit off of your garage concrete. You might say, “I’ll just get the cheapest one,” but as someone who has battled through multiple soft-tissue injuries, I’d encourage you to max out your budget on this one. The mat is the second most important part of the entire simulator, as a cheap one has the ability to hurt you and prevent you from using your investment. For sizing, I’d recommend a minimum of 5×5, but you could go up in size depending on your available space and budget
Here are some options, again listed from cheapest to most expensive:
Preface: There are numerous options on Amazon for very cheap (under $100). I would be extremely wary about using a mat at a lower price point than the one’s listed below. Again, other than durability concerns, the mat will likely sit on a concrete or hard-surfaced floor, and you will be hitting that floor with a golf club moving 80+ mph. Consider what that could do to your joints over time if you get a mat that is not of a sufficient quality.
- Monster Mat – $419 – 5×5 – The Monster Mat is certainly a thinner, cheaper looking mat, but some reviews say this mat is a good product for the value.
- SwingTurf Golf Mat – $499 – 5×5 – An entry level model sold by a popular indoor golf retailer, but is reasonably thick and garners good reviews online
- Rawhide Golf Mat – $500 – 5×5 – Rawhide looks very similar to the SwingTurf and Country Club Elite, and draws similarly good reviews online. Rawhide also sells used mats.
- Country Club Elite – $599 –5×5 – I personally use the Country Club Elite mat. The CCE is basically the industry standard if you do not intend to splurge on a Fiberbuilt. Some report this mat being a little harder on your joints, because it is very unforgiving to fat shots. Some mats will let you get away with bouncing the club into the ball but not this one.
- Fiberbuilt Performance Turf Series – $1,029 – 6×6 – Fiberbuilt has a range of options and are considered to be the best brand of mat available. The Performance Turf Series is their entry level model
- Fiberbuilt Grass Series Studio Golf Mat – $1,199 – 7×4 – Fiberbuilt’s grass series is interesting, as artificial turf that the ball sits on is different than the part that you stand on. This is supposed to be the most forgiving to those with bad joints, so this may be your best option should you be prone to soft tissue injuries. Another related option is their smaller (and cheaper) Fiberbuilt Golf Hourglass Pro Studio Golf Mat, available for around $800 in a 5×4, which is part of the “Grass Series.”
- Fiberbuilt Player Preferred Series – $1,349 – 8×4 – Fiberbuilt’s top offering and represents top of the personal golf mat industry.
Net vs. Impact Screen & Enclosure
As you peruse this article and encounter the prices, you might be thinking that a golf simulator is out of your budget. Fear not; there are two viable paths for your golf simulator journey: (1) a golf net paired with an iPad/TV or (2) opting for the full impact screen experience.
Let’s talk about a golf net first. Of course, a net will not provide the immersive full golf simulation you probably want, but a net and some type of external display can be a sufficient way to work on your game at home, whenever you want. Typically, this setup includes just: a launch monitor, a mat, a net, and an iPad and/or TV mounted to the right of the net.
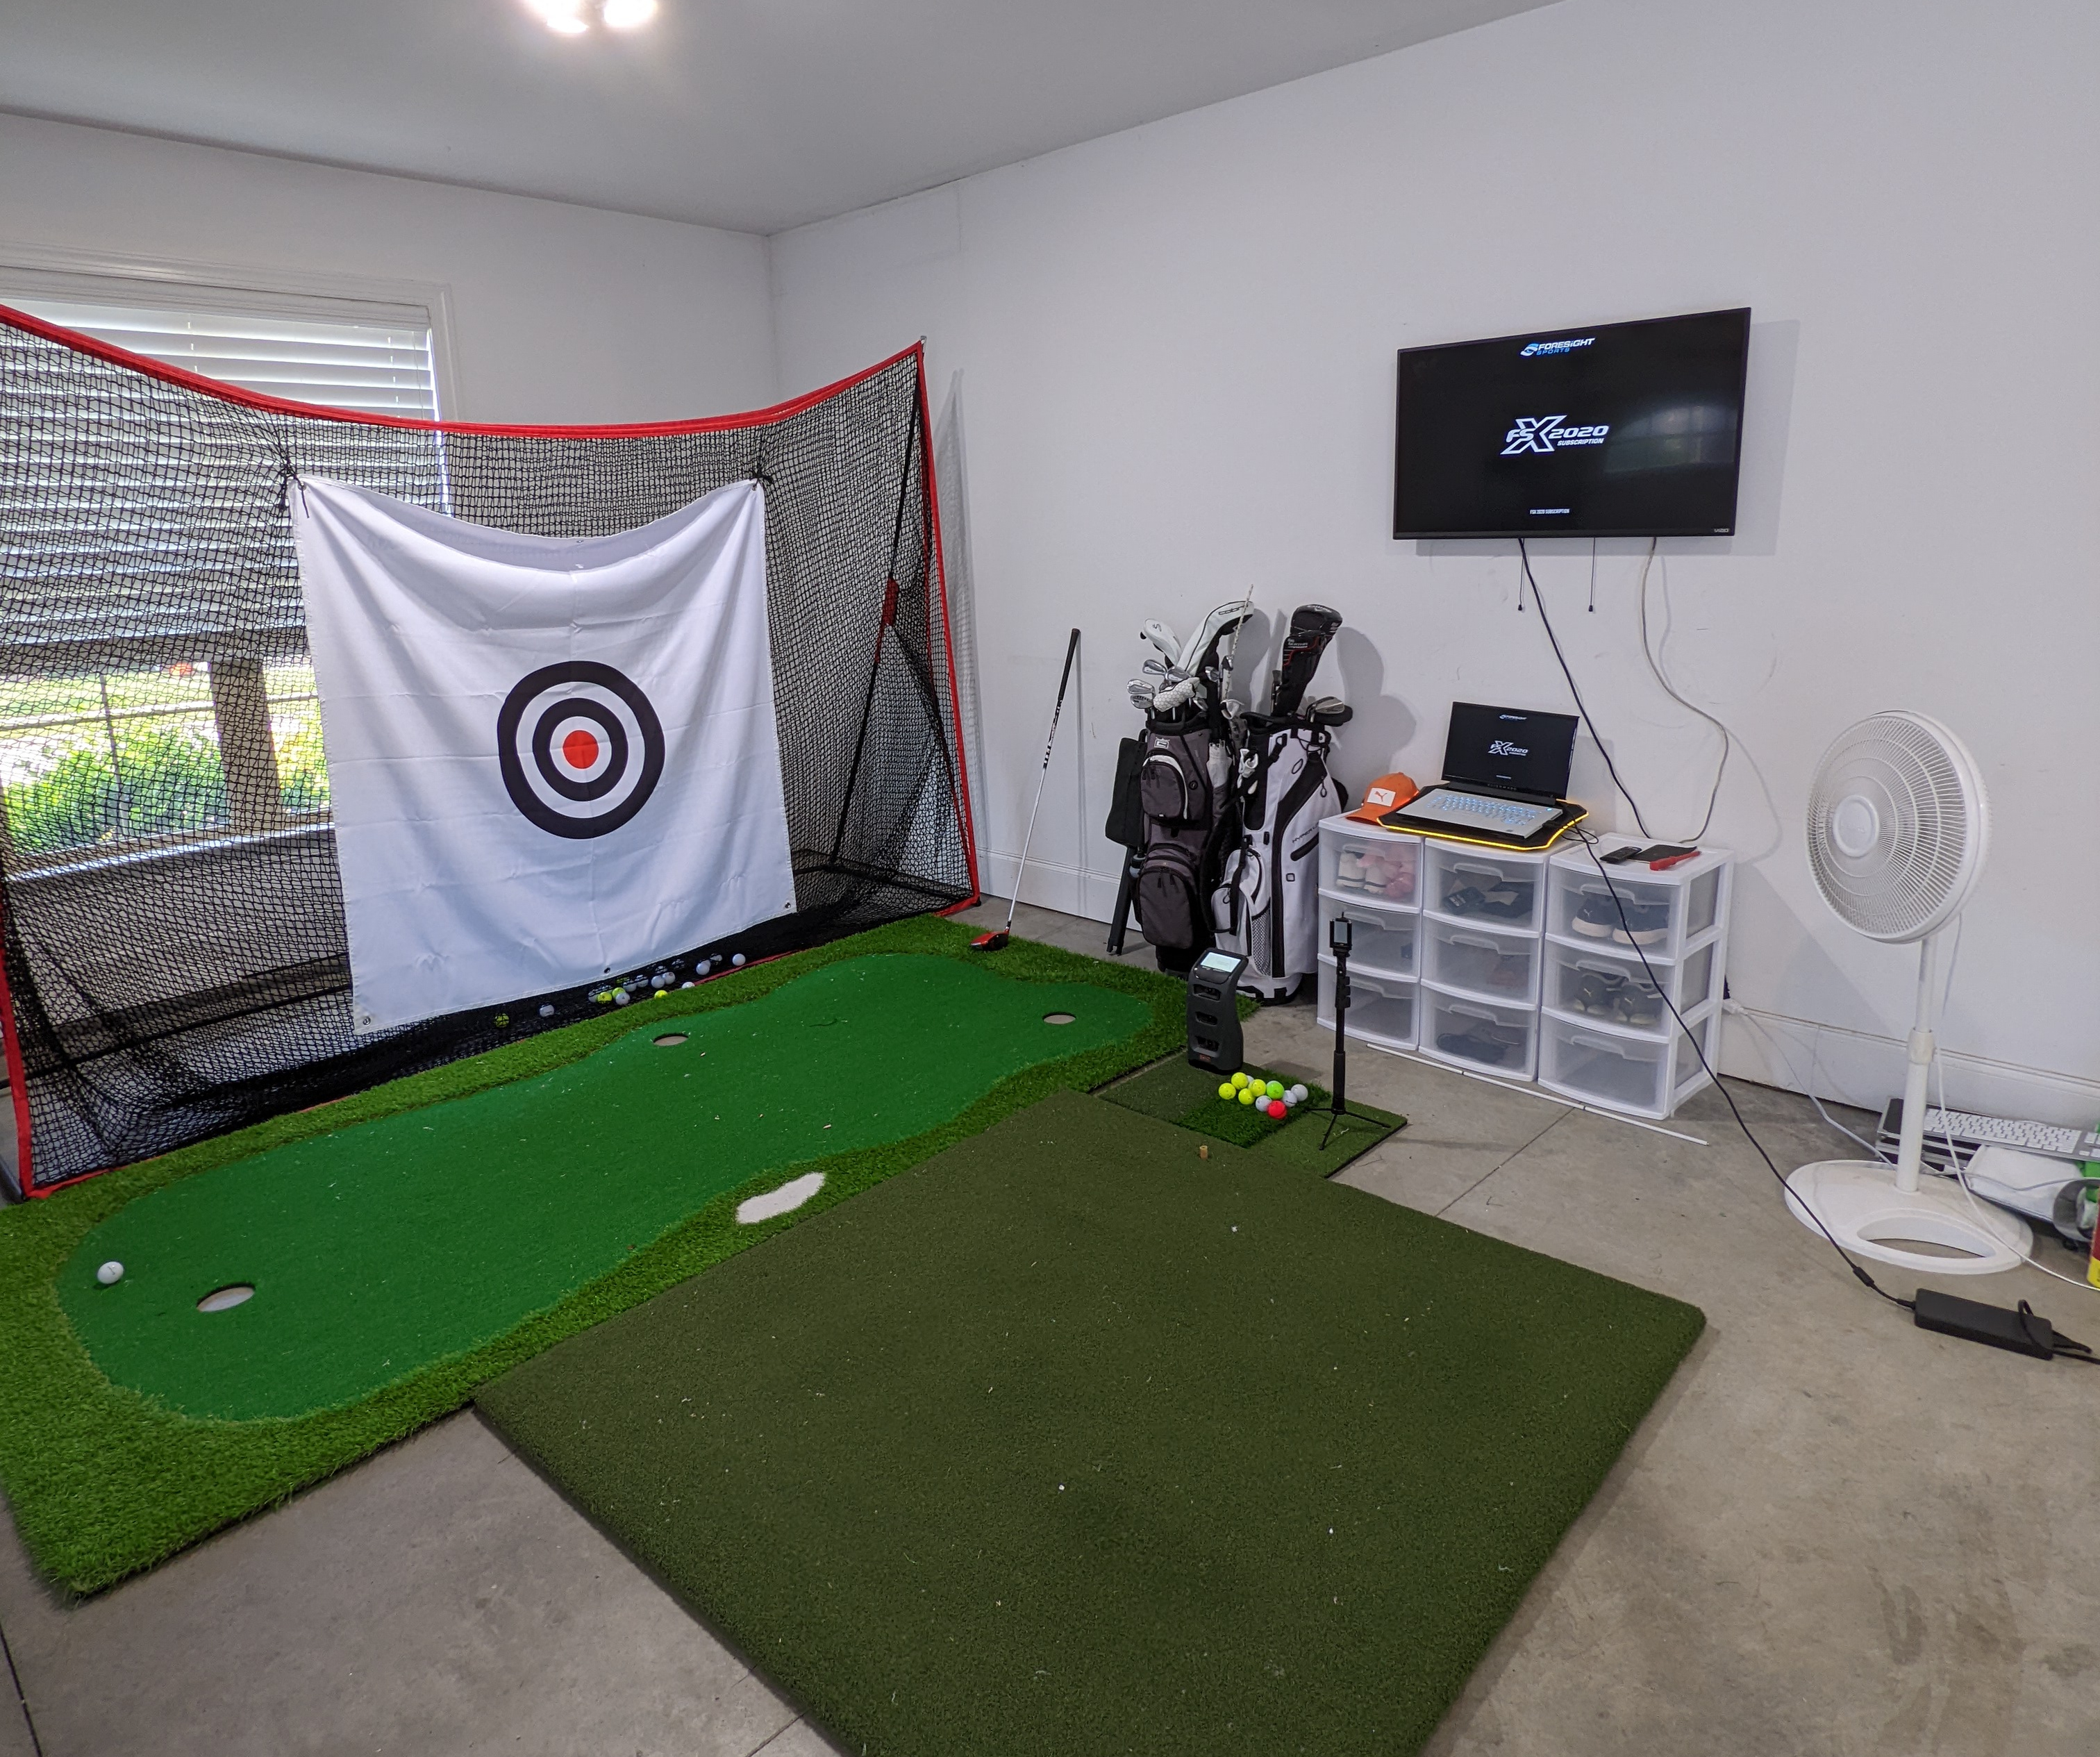
Pardon the mess, but I used my launch monitor paired with a net for some time. First, I used an iPad and an iPad stand to display virtual driving range. Then, I used my iPad and connected to a mounted TV using screen mirroring functionality. Later, I used a gaming PC to run FSX software, and used the mounted TV as a computer monitor. There are options in this space to save money short of the full impact screen.
If you do go with option 2, there are added expenses, because you will need: a launch monitor, a mat, a screen and enclosure, a projector and a computer. This will invariably be more expensive and represents a more significant investment.
My advice: if you are choosing between a full simulator with an impact screen and a cheap launch monitor vs. hitting into a net and a more expensive launch monitor, go with the more expensive launch monitor! You can grow your setup over time, but the more reliable data will improve you game more than an impact screen.
Golf Net Options
If you decide to go the route with just a golf net, be wary. A golf ball hitting a repeated spot on most golf nets will eventually go through the net, no matter how they advertise. The reason: a golf ball spins, and that spin will eventually chew through the fibers of a golf net. Should you go with a net, you will have to have some type of replaceable cloth or fabric target for the golf ball to hit before it hits the net, so the spin can chew that up, rather than the net.
There are two basic schools of thought with golf nets:
- Amazon Golf Net – ~ $100 -This option, again, will require you to use a replaceable target, or a ball will eventually go through, if not multiple times. It will happen within weeks using any net off of Amazon, period, unless you have a replaceable target.
- Net Return Series – ~$600 – The net return is the industry standard in the golf net world, but for the price, you could almost buy a cheap impact screen. Net Return has a number of options, and they have been coming down in price lately, but these can often cost over 5x what a net off Amazon will cost. Now, a golf ball is far less likely to go through these, because they are designed for golf, and they will be quieter than using a cloth target on an Amazon net or an impact screen.
Golf Impact Screen and Enclosure Options
Fortunately, there’s really only one option worth mentioning here in my opinion, and that’s Carl’s Place. Carl’s golf enclosures and screens are the industry standard, easy to assemble and of good quality. (This is not a paid ad, by the way – I’ve never met Carl). Carl’s offers three different types of screens: standard, preferred, and premium. If keeping the noise down is of concern to you, consider going the premium route. Otherwise, standard or preferred will do the job. Impact screens can be loud, so if you have a baby or a temperamental spouse, I would consider springing for the premium.

Carl’s also offers a “DIY” line, which has a 5-foot enclosure and a Pro series with deeper enclosure depths. The five feet are plenty sufficient unless you have a LOT of space and anticipate a high number of shanks.
Some of the other options on Carl’s simulators:
- Pipe Framing Kit – Carl’s will send you the pipe for the simulator frame, but you could elect to save money and go to the home improvement store and purchase and cut the pipes yourself. The pipes are kind of expensive to get shipped, but even for me (a person who DIYs), the convenience of the pipe framing kit being sent to me was worth the extra money.
- Foam Insert Kit – I am a good golfer so I thought I did not need one of these, but I ended up having to do a work around to add these to my simulator. The first time you accidentally make contact with the metal of the frame, you will buy these. Golf ball hit into metal pole is a scary and dangerous thing – consider the Foam Insert Kit an absolute must.
- Back Cover Kit – Remember, your screen will need to be about 1′ off your wall, so some people get a cover to conceal that 1-foot gap so light doesn’t get behind their screen. I’d not consider this to be worth the additional cost.
A reasonably sized, preferred impact screen with an enclosure, the pipe framing kit, and the foam inserts will cost around $2,000 after tax. It is possible to get it a bit cheaper or a bit more expensive, but expect this to be the average cost.
Computer
The launch monitor you choose will largely dictate the type of computer you will have to have to run the intended simulation software. Cheaper launch monitors often offer driving range simulation on an iPad, but for true golf simulation, you’ll need a computer. E6 Connect software will technically run on a high end iPad, should you choose to go with a net and iPad combo. However, you’ll want a computer if you plan on running anything other than E6.
For TGC2019 simulation software, which is the best the Skytrak, Skytrak+, Garmin, and Uneekor use, you will want a PC with the following specs:
- OS: Windows 10 or greater.
- Processor: Intel Core i7 @ 3.20GHz or equivalent (or better)
- Memory: 8 GB RAM
- Graphics: NVidia GTX 1060 (or better)
- Network: Broadband Internet connection
Here are some options that will run that software:
- Desktop: MTG Aurora 4T ~ $700
- Laptop: Acer Predator Helios ~ $1,000
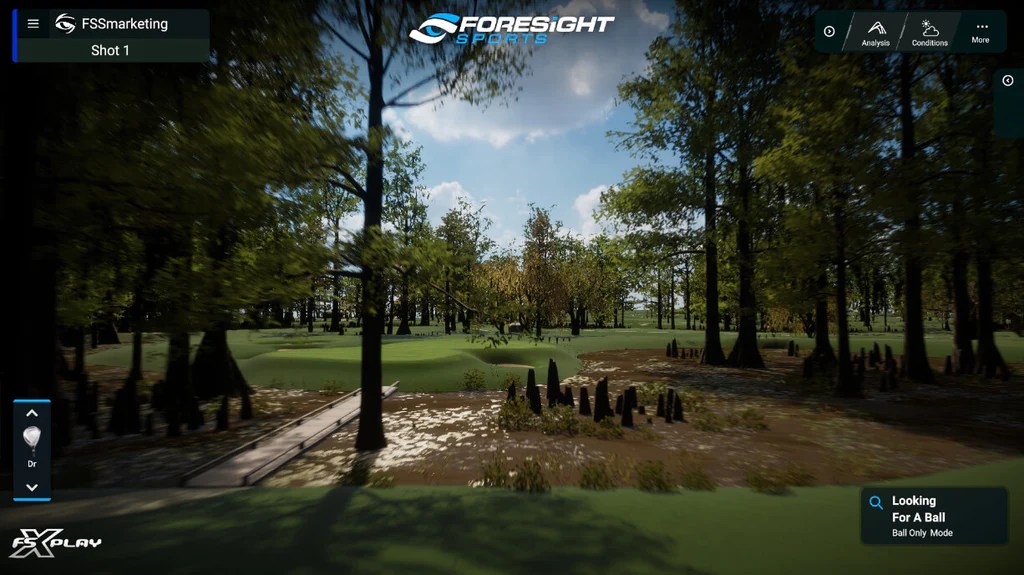
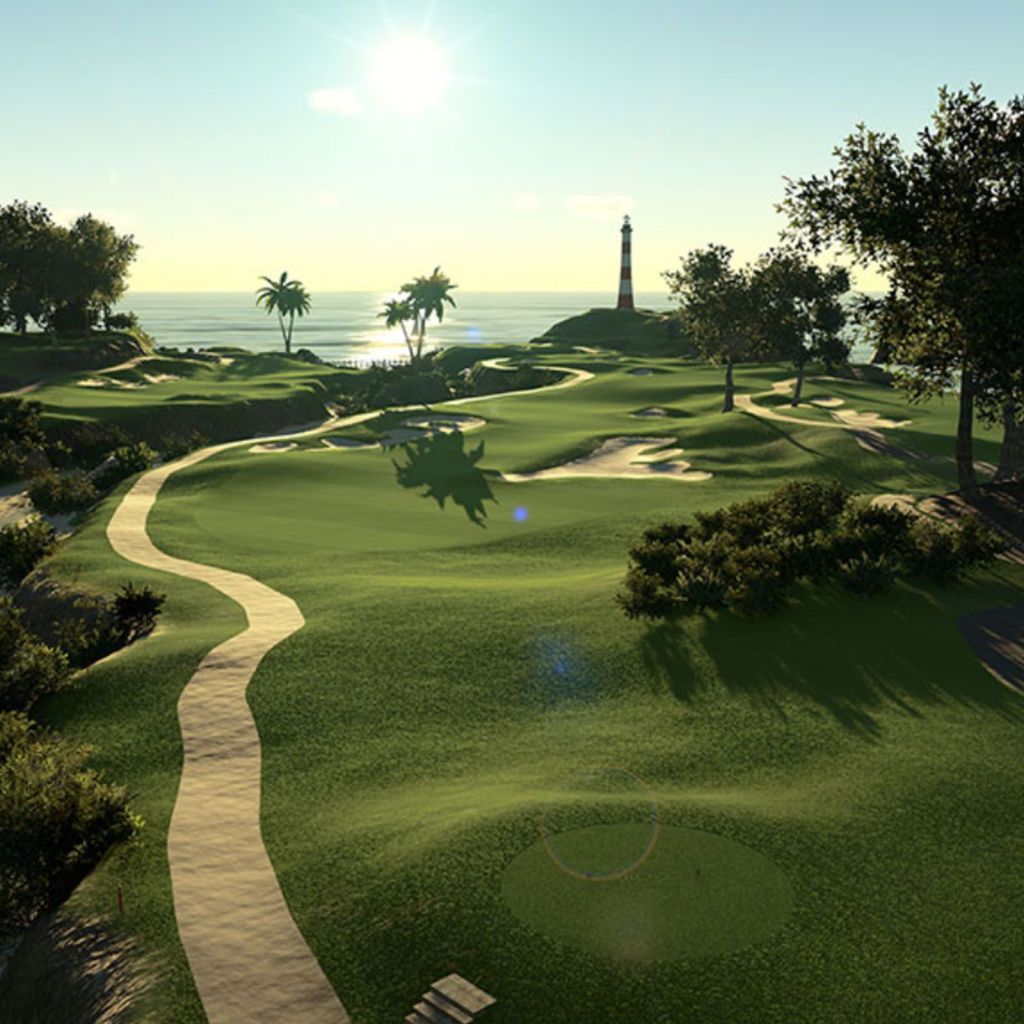
For Foresight Products like the Quad, GC3 and Bushnell Launch Pro, the industry standard was FSX 2020 for years, but in recent months, Foresight has released FSX Play. FSX Play requires a bit of a beefier PC, but has great graphics! You will want a PC with the following specs:
- OS: Windows 10 or greater.
- Processor: Intel Core i5 or greater (7th gen or greater). AMD is NOT supported.
- Memory: 16 GB RAM
- Graphics: NVidia RTX 3070 (or better). AMD is NOT supported.
- Network: Broadband Internet connection
Here are some options that will run that software:
- Desktop: ASUS – ROG Gaming Desktop~ $1,200
- Laptop: GIGABYTE AORUS 17 YE5 ~ $1,800
If you intend to run GSPro, which is becoming more and more the industry standard, as most launch monitors will connect to GSPro with the recent addition of Foresight’s lineup, you will want a PC with the following specs:
- OS: Windows 10 or greater.
- Processor: Intel Core i5 or greater (7th gen or greater).
- Memory: 16 GB RAM
- Graphics: NVidia RTX 3060ti (or better).
- Network: Broadband Internet connection
Here are some options that will run that software:
- Desktop: Skytech Gaming Shiva Gaming PC ~ $1,100
- Laptop: Acer Nitro 5 ~ $1,600
Lastly, if you are springing for a Trackman and intend to run Trackman’s software, I will assume money is no object for you. It has similar system requirements as GSPro but here’s what I’d recommend:
- This will work, if you aren’t rich: Desktop: ASUS – ROG Gaming Desktop ~ $1,200
- But you probably want this if you are very rich: Cooler Master 30th Year Anniversary Cosmos Infinity Gaming PC ~ $5,000
Keep in mind that the software typically does cost some varying fee to use, be it through expanded course access or access to the program at all.
Projector
The projector is an area that has infinite models and considerations of which to be aware, so I would recommend you spend at least 20 or 30 minutes on projectorcentral.com in order to learn how projectors work, how to mount them, how to make images larger and smaller, keystone corrections, etc. I especially recommend this if you do not have experience with projectors.
When shopping for a projector, it is important to use a reputable brand, make sure the aspect ratio of the projector is compatible with your screen, and make sure that the projector can produce the requisite image size in order to fill up the screen based on your room dimensions. There are much more informed sources than myself on projectors, and I recommend you seek those out.
I would recommend you visit BenQ’s Golf Sim Room Planner as well. It is the best resource for projector planning currently on the internet.
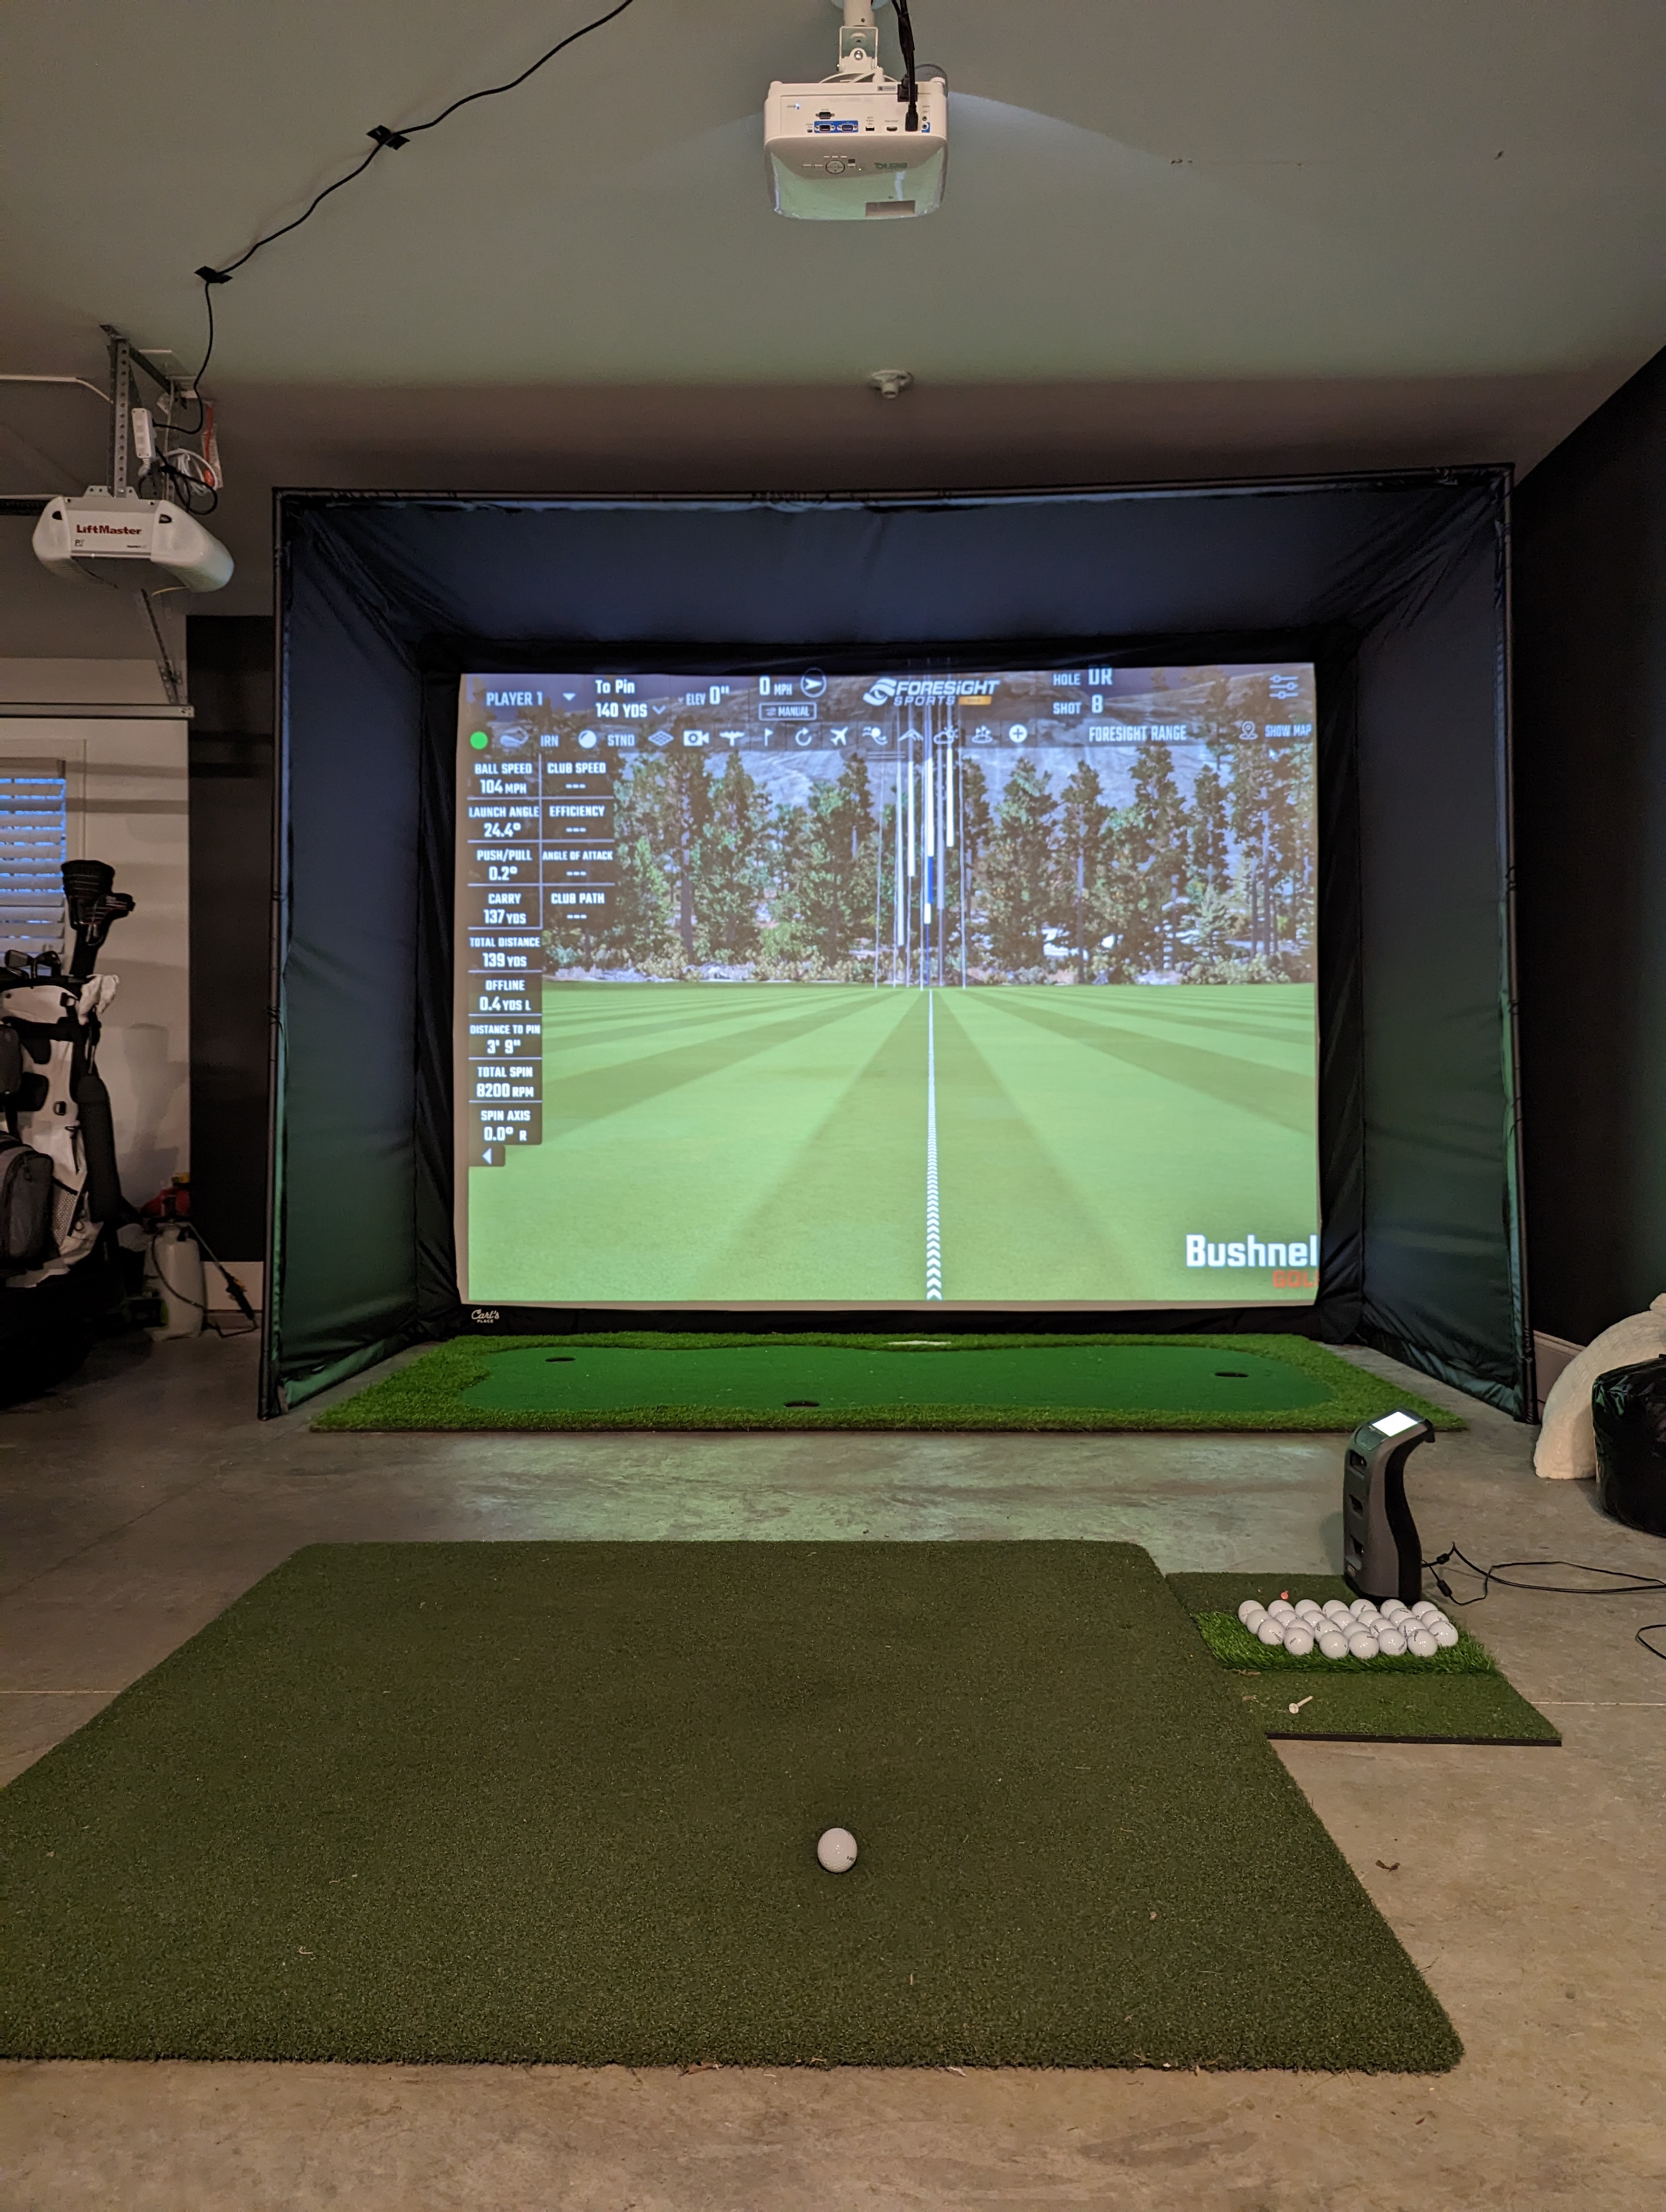
I decided on a short throw BenQ projector that does 4:3 resolution and is mounted directly over my hitting mat.
Accessories
Some other items you need to consider that are less essential but are definitely desirable.
- A floor mat or landing pad – when you hit the golf ball into the screen, it will hit the floor. When the ball hits the hard floor surface it will bounce – and bounce – and bounce. So having a soft landing for the ball is paramount. There are specific mats made for this purpose, but you could also use a large putting mat that is of an appropriate width.
- Computer Desk – Somewhere in the room, you will want an area to store the computer tower, whether that be a small desk or table, or a computer cart.
- Projector Mount – There are two main ways projectors are mounted: Overhead Projector Mounts or a Floor Projector Enclosure.
- Cords – Dont forget HDMI Cords or DisplayPort Cords of considerable length, as well as Cord Concealers.
Ideal Builds
Budget build using a Net:
- Launch Monitor: FlightScope Mevo+ 2023 Edition – $1,999
- Net: NetReturn Home Series v2 – $500
- Mat: Country Club Elite – $600
- Computer: iPad air – $600
- Display: iPad Stand
- Total Cost: ~ $3,800
Budget Full Simulator
- Launch Monitor: SkyTrak+ Launch Monitor – $2,995
- Impact Screen: Carl’s Place Standard Screen w/ DIY Enclosure (8×10.5) – $1,800
- Mat: Country Club Elite – $600
- Computer: Skytech Gaming Shiva Gaming PC – $1,100
- Projector – Any projector that meets room specs – $1,000
- Landing Pad: Turf Landing Pad – $400
- Accessories – $100
- Total Cost: ~ $7,995.00
Mid-Level Full Simulator
- Launch Monitor: Foresight GC3 – $7,000
- Impact Screen: Carl’s Place Premium Screen w/ DIY Enclosure (9×12) – $2,300
- Mat: Fiberbuilt Player’s Preferred – $1,350
- Computer: ASUS – ROG Gaming Desktop – $1,200
- Projector: Any projector that meets room specs – $1,000
- Landing Pad: Turf Landing Pad – $400
- Accessories: $200
- Total Cost: $13,450
Perfect Home Golf Simulator
- Launch Monitor: Trackman 4 or GCQuad – $21,000 – $25,000
- Impact Screen: Carl’s Place Pro Enclosure – $5,200
- Mat: Fiberbuilt Player’s Preferred – $1,350
- Computer: ASUS – ROG Gaming Desktop – $1,200
- Projector: Any projector that meets room specs – $1,000
- Landing Pad: Turf Landing Pad – $400
- Accessories: $500
- Total Cost: ~$35,000

Author: Jaxon MacGeorge
Jaxon is the founder and lead course reviewer at First1000Courses.com. Jaxon has been playing golf for over twenty years, is a scratch handicap, and actively competes in USGA and Tennessee Golf Association (TGA) amateur events. By trade, Jaxon is an attorney and lives in Gallatin, TN, a suburb of Nashville.

Leave a comment